
Upgrading our smartphones has become a necessary chore.
And because our phones are more computer than phone these days, the process is not only a hassle but also a risk.
In whose hands will your old device end up, and is there anything they can glean from it? Taking the time to properly purge your phone may prevent unauthorized access to your accounts.
Another thing to consider in the transition is whether you’ve grabbed everything you need, such as important files and password authenticators.
Following are some important precautions to take before trading, selling or otherwise disposing of an old smartphone.
1. Back up everything

Your smartphone likely has built-in tools to port over your data and settings to a new device quickly and easily. But you shouldn’t rely on them to include everything you might want to keep.
Take the time to manually copy your photos, videos, notes, music and any other files you want to preserve. The easiest way to do this may be to send everything to a cloud storage service such as Google One, Microsoft OneDrive, Dropbox or iCloud.
In the worst case, you’ll find out you wasted your time because the phone data transfer did a thorough job. Great, just delete the duplicate files if you don’t want them. In any other scenario, though, you’ll be happy you did the backing up yourself.
2. Delete account information

If you let your phone or browser save your passwords, it’s easy to forget you’re conveniently bypassing part of the login process. But if someone dishonest inherits your old phone, you won’t want them to have equally simple access to your accounts.
Don’t leave a digital trail behind. Make sure to log out of any accounts, delete any saved passwords or account records and clear out the browser history.
3. Prepare to transfer 2FA to your new device

Passwords are one thing. But if you’re smart, you’re also protecting your accounts with two-factor (or more) authentication, often abbreviated as 2FA.
That’s when your accounts basically require two keys: a password and a second form of verification that may be a one-time code sent to your phone, email or an authenticator app. Two-factor authentication makes it very hard for thieves to access your accounts even if they have your password. That is, unless they also have your phone and authenticator app.
Even if you plan to completely wipe the device or smash it with a hammer, take 2FA into consideration first — otherwise you may find yourself locked out of your own accounts.
If you use an authentication app for 2FA, be sure to transfer it to your new device before you part ways with your old smartphone. Here are instructions for two of the most popular authenticator apps:
4. Remove any SIM or memory cards
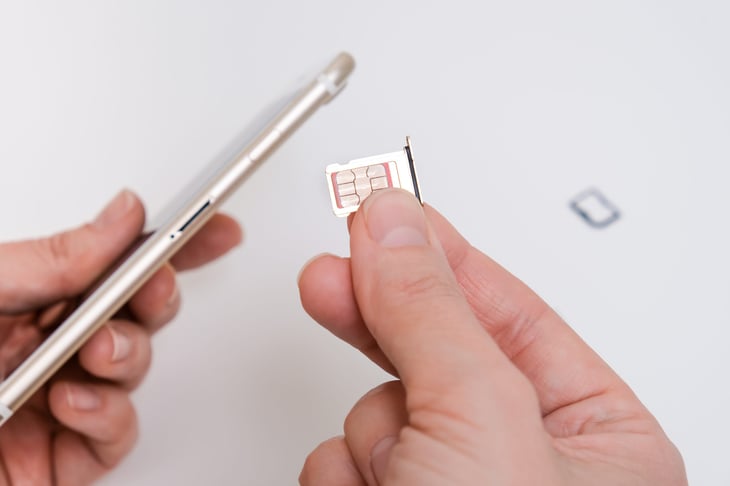
Don’t forget things that should physically come out of your phone. Grab your SD memory card if your device has a slot for one.
If your phone stores your wireless service account information and phone number on a physical SIM card rather than an eSIM, you may want that too.
5. Completely reset your device

It might seem nonsensical to take some of the previous precautions when your phone is capable of performing a “factory reset,” restoring it to the state it was in when it was new.
But a quick internet search will turn up plenty of questions and tutorials about recovering phone data after a factory reset. There’s no point in taking the risk your phone might not get the job done and leave something important behind for a clever user to find.
Nonetheless, a factory reset is likely to catch at least some data you forgot to delete, and it’s probably the simplest thing on this list to do. Here are instructions for iPhone and Android devices.